After casually posting a video to my IG stories of a batch of Hibiscus Lemonade I made last week, I was so surprised at all the messages I got asking for the recipe. This was the easiest “no recipe” recipe I’ve made in a long time and it was inspired by the Jamaica Agua Frescas I love to order whenever I go to my local taco stand here in LA.
I wasn’t necessarily planning on making this delicious drink but I happened to find the dried hibiscus flower in bulk on my first visit to Tare Grocery and immediately had to have some. I love hibiscus, it’s so tasty and so good for you too.
When I got home I remembered all the lemons in my fridge and got to making some lemonade with my newly purchased flower. I brewed the tea, added raw honey for sweetness, some freshly squeezed lemons and a lonely orange I found hiding out in my fruit drawer. It came out wonderful for just throwing a few things together unplanned.
If you can find some dried hibiscus flower, I highly recommend making this in bulk and keeping a pitcher in the fridge for a refreshing drink all summer long. I’ve already made a second batch. Enjoy friends! Recipe Below
Fresh Hibiscus Lemonade by Andrea Pavlov
Recipe:
-2 Tbsp dried hibiscus flower
-4 cups water
-¼ cup raw honey (more or less depending how sweet you want it)
-4-5 lemons
-1-2 oranges
-Bring water to a boil and steep the hibiscus for 15-20 minutes
-Meanwhile, squeeze your lemons and oranges (it should yield 1½ – 2 cups juice)
-Remove hibiscus and mix in your honey while the tea is hot so it melts
-Add the lemon/orange juice and mix
-Pour in a pitcher and let cool to room temperature before storing in your fridge
-Can be enjoyed hot or cold!
It was a year ago today, around my birthday, when I was thinking a lot about Italy and the food I’ve loved since I was a boy.
I never thought of myself as much of a cook, but over the past year I’ve come to see that the fundamentals of cooking aren’t half as complicated as I thought.
And while I can’t pinpoint exactly how or why it began with marinara sauce, I think it had something to do with travel.
I was 18 years old when I first visited Italy and the experience changed my life. For one thing, it was one of the first countries where I spent any good amount of time outside of the States. Not only did it broaden my perspective, but it did so in a way that inspired a deeply-rooted trust in the basic goodness of people, a trust that continues to this day.
Never in my life had I met people who were so consistently happy, helpful and welcoming; and the realization was enough to make me weep especially when complimented with a cuisine so unbelievably good that I was convinced I could feel the love of a people put into it with every bite.
And then of course, there was the wine. I’d never really sipped or much less enjoyed wine before, but that first night in Rome marked the beginning of a love affair which, as my best friends will certainly tell you, also lasts to this day. Chianti remains my favorite wine. Forever and always.
Simply put, Italy is one of the most friendly, romantic, sexy, joyous and culturally rich countries I have ever visited in my life. It was an incredible way to begin what I further hope is a long life of travel.
So I guess I can tell you exactly why I began my cooking trip with marinara sauce–because every time I make it, I reflect on these experiences. I think about the old ruins and cobblestone streets of Rome, the ornate fountains, the candlelit restaurants that feel like they might stay open all night. I think about the hills and cypress trees of Tuscany, and the Arno River in Florence glowing in the moonlight. I think about the history. The ghosts of the Coliseum. I think about the art. The art! This is the land of Michelangelo and Leonardo Da Vinci. The Renaissance. The opera! This is La Dolce Vita and the surrealist dreams of Fellini and the great masters of Italian cinema.
It’s a place where time doesn’t exist except in all the right ways, and for all the right reasons, where you’ll see flashes of modernity amid the backdrop of ancient ruins. For me, life is a flashing moment and one great big beautiful trip that ought to be celebrated and revered. Italy is a place that encapsulates that realization, one that I hope is a realization for the rest of the world that encourages us to not take life for granted, but to cherish it and truly cherish one another.
Finally there’s one other reason why I appreciate making the sauce. As it’s a reminder of that first experience in Italy, perhaps by extension, it also reminds me of the excitement in beginning something new, something that’s about to unfold in a way I can’t even begin to imagine.
It’s the thrill of being a beginner, when everything is unknown and mysterious and you’re unburdened by any heavy expectation because, in the beginning, you’re too humble and open-minded to indulge it. I try to maintain that mindset in everything that I do. Though I’ve learned and experienced a lot in the time in between, I still like to consider myself an amateur. I wouldn’t have it any other way.
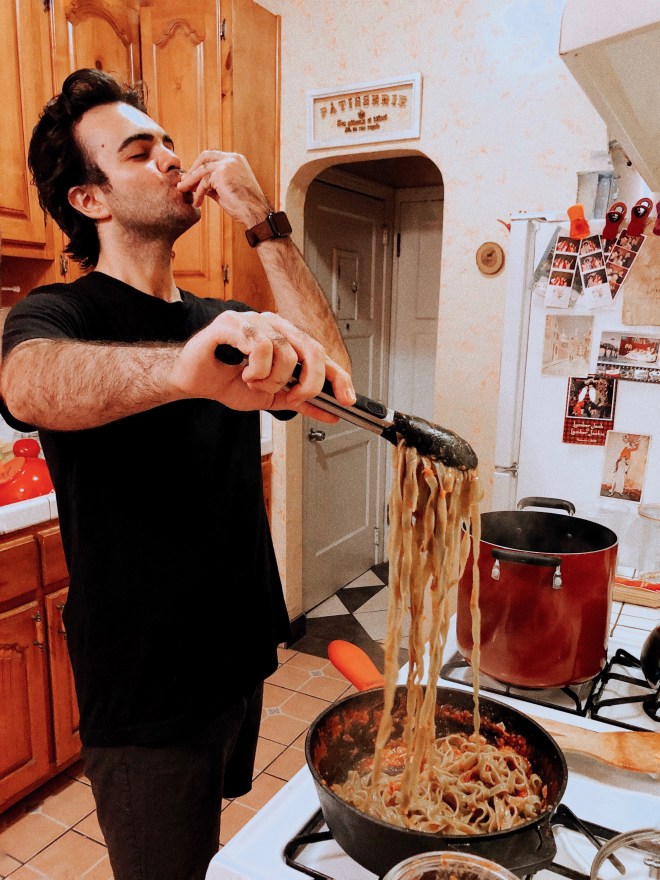
Molto Bene! Me in my kitchen, the night I first made the sauce.
Now, let’s get to the dish. Like many people, Italian food is my favorite cuisine, and though I’m inclined to say that it’s more the intangibles that I appreciate the most–the warmth, the attitude, the lack of pretentiousness, the familial, convivial nature of the restaurants and the country, the red wine and all those wonderful things I mentioned earlier–if there is one constant that makes me enjoy Italian food as much as I do, I would have to say it all comes down to the sauce.
Since I was new to cooking, I figured marinara was a simple enough dish to start, since it incorporated so many basic principles of cooking: using fresh ingredients, prepping the ingredients, using oils and garlic effectively, knowing how and when to add salt for taste, and then, my favorite part, the process of letting something cook slowly while you periodically check in to stir, maybe add more salt or get a better idea of how much time you have left. Of course, you’ll likely add your own flourishes and personal touch with time, as I typically do myself, but here are the fundamentals.
—
Recipe:
1 can of whole tomatoes (preferably San Marzano)
1/4 cup of extra virgin olive oil
7-10 cloves of garlic
A little basil
Salt
And that’s all you need my friends.
—
Directions:
Prep your garlic by slicing thin. The thinner the better.
Crush the tomatoes by hand in a big bowl.
Add the oil to the pan and heat over medium, add the garlic and then let it sizzle, 1-2 minutes so it doesn’t burn. When that happens, go ahead and add the crushed tomatoes. I like to add a cup of water, which I’ve poured into the empty can of tomatoes to get any remaining bit of sauce.
From here, just let it look and stir every twenty or thirty minutes. Add salt to taste. When it starts smelling real good and the water has absorbed, you’ll have your sauce, finish off with thinly sliced basil. Buon appetito!
As you can see, we’ve provided our own curated Spotify playlist above. If you’re looking for upbeat, Louis Prima is the way to go. If you’re looking for romantic, try anything by the legendary tenor Luciano Pavarotti. You might also consider the soundtrack to the Godfather.
For some reason I enjoy listening to film scores when I cook. Another great album is the score for Anatomy of a Murder by Duke Ellington. If you’re looking for smooth, try Quincy Jones’ I Dig Dancers or The Quintessence, or Henry Mancini’s score to the Pink Panther.
Dried Garbanzo Beans: Three Ways – Cooked Beans, Falafel or Hummus
Well it goes without saying these days have been an adjustment for most of us and we’re all figuring out the best ways to cope with it. As difficult as it can be emotionally and financially, my hope is that most of you are quarantined at home doing the best you can while we wait and see how the days continue to unfold.
I have been in self-isolation for over two weeks now, only venturing out when necessary. The rest of the time, I’ve been home…working some, reading some, and cooking a whole lot more.
Cooking is my coping method. Not only does it keep me busy (sometimes for hours) but it brings me joy, makes me feel useful, and best of all, leaves me with a fridge full of good food to eat for days.
With all of the panic buying that’s been taking place, especially for pantry items/non-perishables, I’m sure it’s left a lot of you with more cans and bags of dried beans than you know what to do with.
But fear not! I already keep a surplus of dried beans handy and I love to make a big batch for the week to use in different ways.
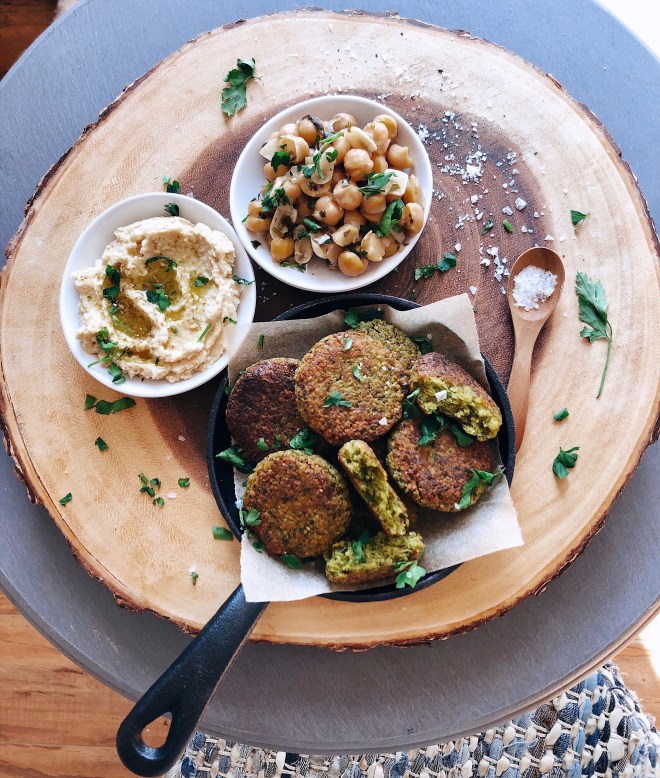
Here is a quick video I made that uses one 16oz bag of dried garbanzo beans three different ways: falafel, hummus and cooked beans. See below for individual recipes and notes.
To begin any of the three recipes, start by pouring the bag of dried garbanzo beans into a large bowl and covering with water to soak overnight. Once soaked, rinse them well with cool water.
Falafel
Ingredients:
-⅓ of soaked garbanzo beans (uncooked)
-1 bunch of parsley (remove stems)
-¼-½ cup of any other greens you might have (cilantro, kale, spinach, beet greens, radish greens, etc. this is optional)
-1 medium lemon
-2-4 cloves garlic (depending on your preference)
-half an onion (any variety works)
-salt to taste
-½ Tbsp cumin
-¼ tsp cardamom (optional)
-½ tsp turmeric (optional)
-¼-½ cup flour
-¼ cup cooking oil (grapeseed, avocado, coconut, etc.)
Method:
-Add all ingredients except soaked beans, flour and oil to a food processor and pulse until well combined, scraping the sides down as you go
-Add soaked beans and pulse until combined, continuing to scrape the sides down
-Taste for seasoning and add salt as needed
-Start adding flour a little at a time (you may not need the full amount) and pulse to combine
-Once you have a smooth paste, transfer to a bowl, cover and refrigerate for at least 30 min or up to overnight
-Remove cooled dough from refrigerator and form small discs
-To cook, heat a cast iron or non-stick skillet on medium high with ¼ cup cooking oil (make sure oil is hot before adding the falafel)
-Place falafel discs in skillet (do not crowd the pan) and cook until browned, about 5-8 min per side (you may have to adjust the heat if they’re browning too quickly or not fast enough)
-Place cooked falafel on a dish until all the dough is cooked
-Serve warm over pita bread, with hummus or tahini, with salads or bowls, the options are endless!
Notes: Falafel is typically made with just parsley but I love to add different greens for extra nutrition and just to use up extra greens I might have. I feel that it doesn’t affect the flavor but try it out as you see fit. There are countless recipes using canned garbanzo beans but I have not had much success with any of them. I have found the best method is to use dried beans that have been soaked overnight for the right texture.
Hummus
Ingredients:
-⅓ of soaked garbanzo beans (cooked in water with kombu for about an hour, until tender)
-1 lemon
-2-4 garlic cloves
-3 Tbsp-⅓ cup tahini (optional but delicious)
-about ¼ cup extra virgin olive oil
Method:
-Add all ingredients except olive oil to a food processor and pulse until well combined
-Continue to pulse and add olive oil to the mixture, scraping the sides down as you go
-Continue mixing until very smooth, at least 3-4 minutes
-Transfer to a bowl/container and enjoy!
Notes: I cook the beans with kombu, a seaweed to aid in digestion, it’s totally optional but I have found it beneficial. It does not add any taste or texture to the beans. You can remove the garbanzo bean skins for extra smooth hummus (very time consuming but worth it if you want the smoothest texture.) I prefer to make the hummus when the garbanzo beans are still warm but you can pre-cook them and keep them in the fridge until you’re ready to make it. If using canned beans, follow the same process but drain and rinse the beans first (they do not need to be cooked ahead of time).
Cooked Beans
Ingredients:
-⅓ of the soaked garbanzo beans (cooked in water with kombu for about an hour, until tender)
-1 shallot (or onion), minced
-4 cloves garlic, thinly sliced
-salt and pepper to taste
-½ tsp dried oregano
-¼ cup parsley or other herbs you have (cilantro, thyme, etc.), chopped
-3 Tbsp extra virgin olive oil
Method:
-Heat oil in a medium pot and add shallot, garlic, salt, pepper and dried oregano, cook until fragrant about 2-3 minutes
-Add juice of lemon and parsley and saute for another 2-3 minutes
-Add pre-cooked beans and vegetable broth
-Bring to a boil and simmer until most of the liquid is absorbed, about 15 min
-Serve warm, over rice or any other grain, in mixed bowls, with salad, etc.
-Keep leftovers refrigerated. You can add to soups or even puree into hummus as well.
Notes: I cook the beans with kombu, a seaweed to aid in digestion, it’s totally optional but I have found it beneficial. It does not add any taste or texture to the beans. You can use canned beans as well just make sure to drain and rinse them well beforehand. This base works well for any type of bean. I love the delicate flavor of the shallots but you can use any variety of onion you might have on hand. You can also add some red pepper flakes if you like it spicy.